
The Gutenberg block editor has altered the editing experience totally for the creation of media-rich pages and posts. The concept is based on ‘block’ based editing system and hence the name ‘Block Editor.’ The entire editing procedure using blocks is more flexible than ever before.
In block-based editing system, a single document is broken down into a collection of specific blocks, in a structure that is easy to modify.
Since its launch, there have been many concerns regarding the usages of blocks, as most users are accustomed to the usage of ‘Classic Editor,’ which is mostly similar to the Microsoft Word. The block editor introduces an effortless page and post building experience. You can control each layout of your post or page with ease.
The blocks introduced more dynamic editing features such as the drag and drop functionality, reusable blocks and many more new features. It enables you to quickly add, customize multiple media and visual elements that used to require shortcodes, custom HTML code and embeds. In fact, switching to the block editor really helps you save time while creating media-rich content.
There are several tutorials regarding usage of Gutenberg Blocks. Trust me, it’s way easier than before to create awesome and engaging content.
You can have an easy start with easy tutorials such as on how to move blocks or how to add affiliate links using Blocks.
The block editor has brought in an easy away of adding columns to the pages or posts. You can add novel formatting features within your content all using the columns.
Now let’s check out how to add achieve this in simple steps.
To Add Columns to a Page or Post
Follow these simple steps in order to add columns in your pages or posts:
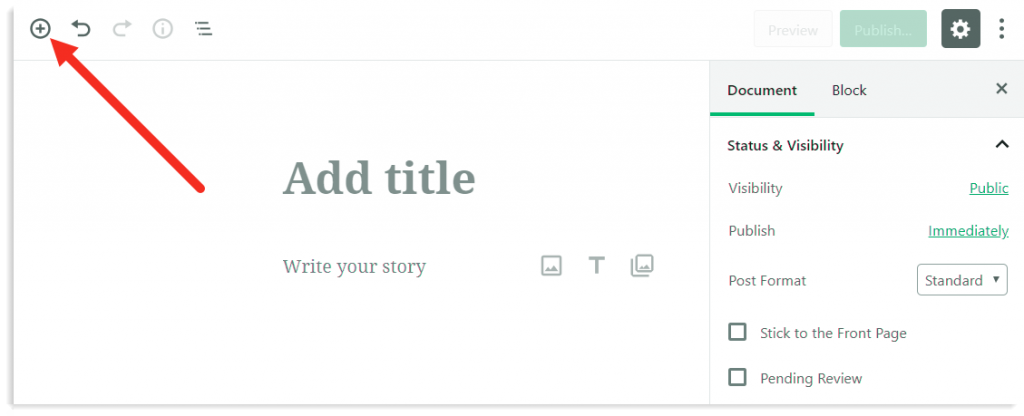
- Log in to the WP admin interface, then navigate to a page or post editor.
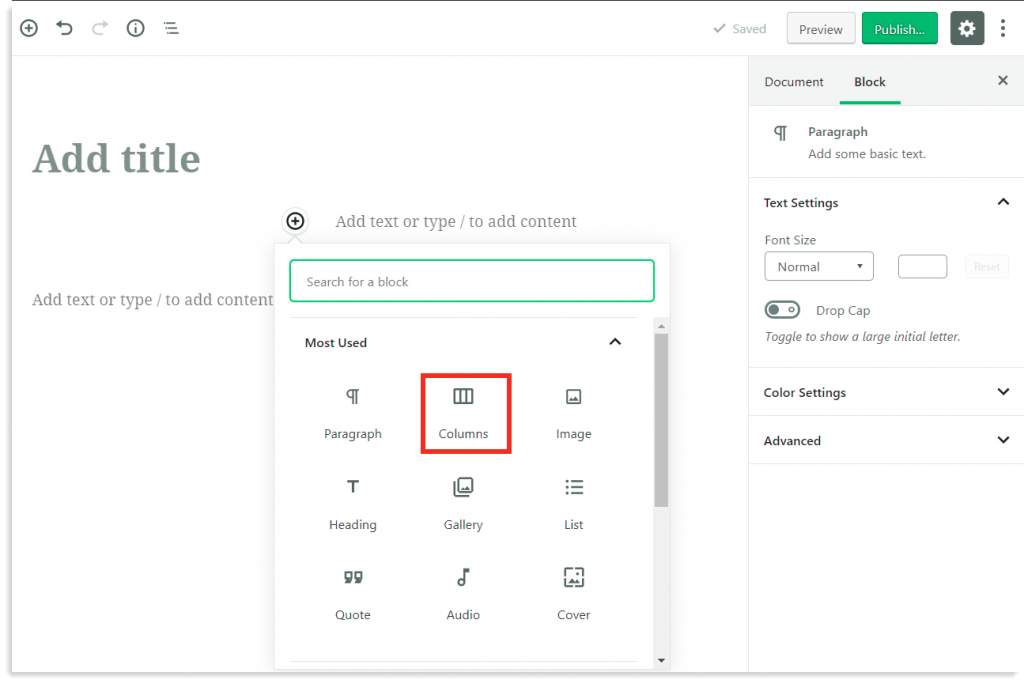
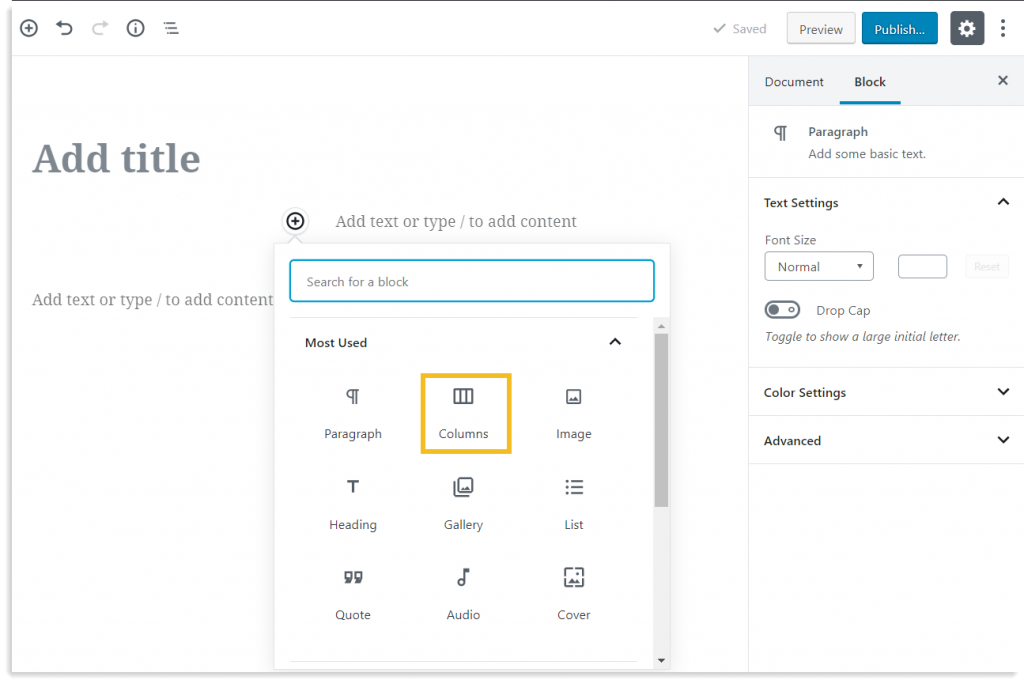
- At the top of Navigation Bar, you can see a circled plus button. Click the button.
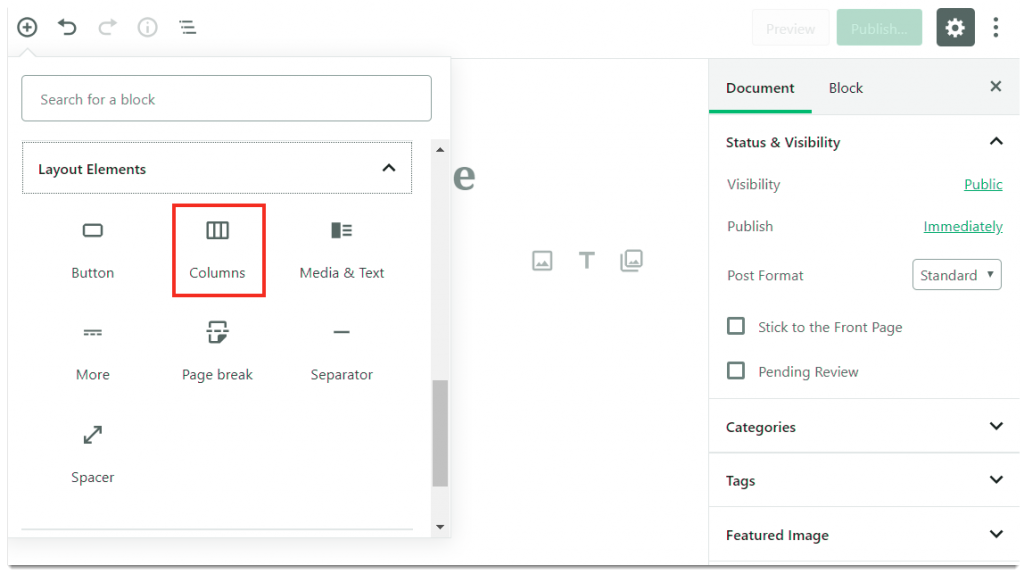
- Next, search and find out the Columns block and click on the ‘Columns Icon’ to add it.
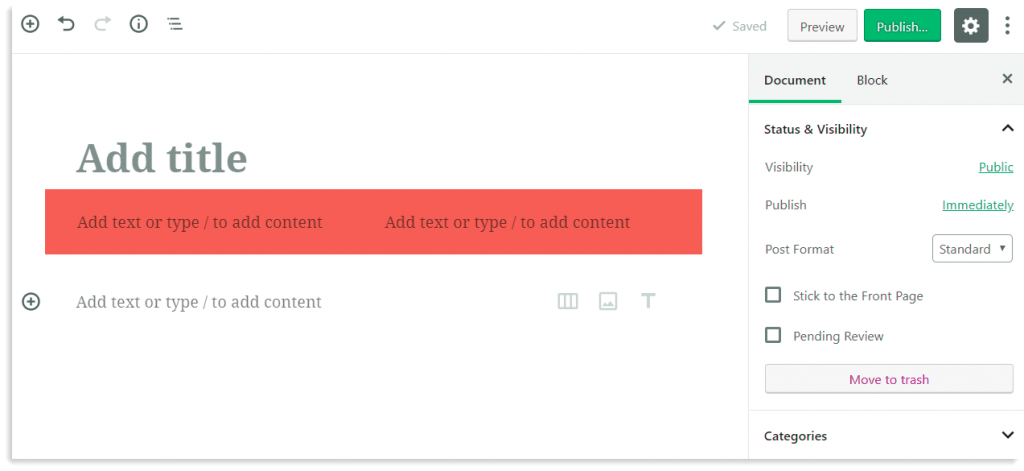
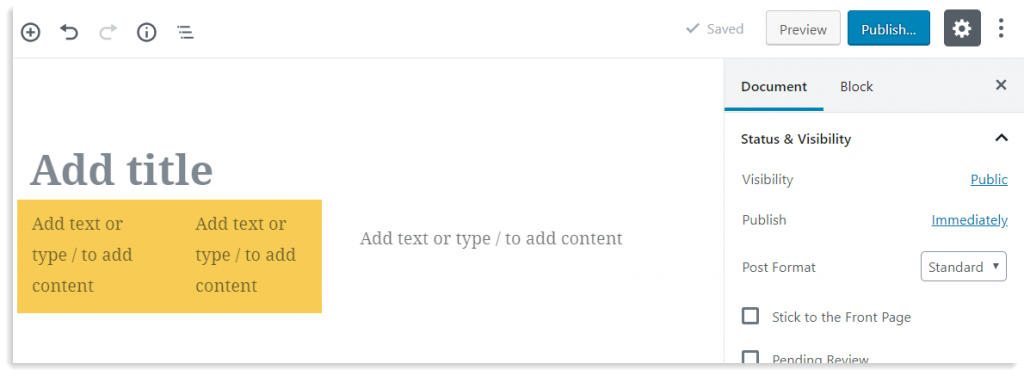
You can see that a column block is added to your page or post. By default, the content in the section appears being split into two columns as you can see in the image given below.
 So, now you have successfully added a column block into your post. The next task is to add content within the column block.
Let’s see how it’s done.
To Add Content inside Column Blocks
You can add insert text, media and other types of content within the columns. The content will be restricted to the column’s area. To add content within columns, follow these steps:
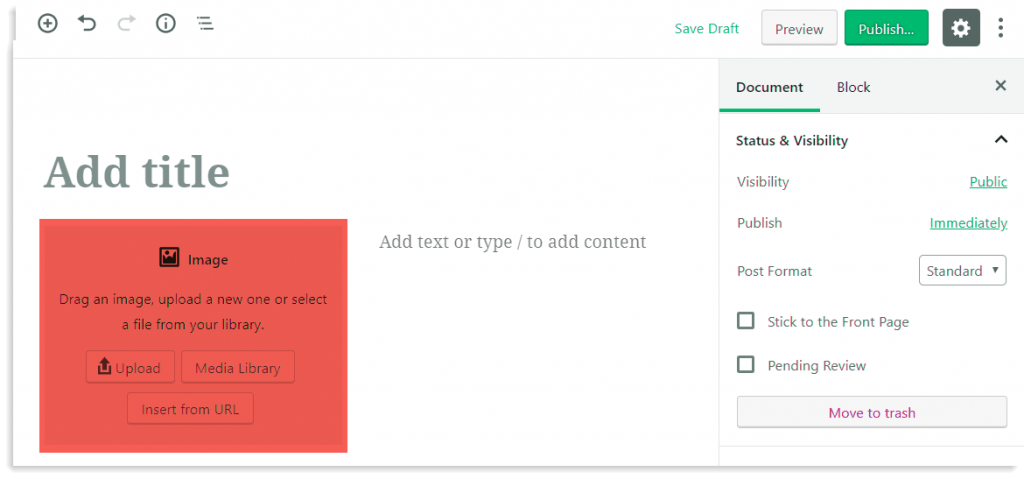
- Hover over the column section where you want to add content.
- Click on the circled plus button that appears within the column block.

- Choose the content block you want to add and click it. You can choose the paragraph block if you need to add text. If you want to insert an image choose the image block.
- The content you selected will be added within the column section.
To Add More than Two Columns
You can choose the block layout of three columns. But what if you need to have more than three columns on your page? Well, no worries because you can nest column blocks within a column.
Let’s see how to add more than two columns:
- Add a column block say containing two columns.
- Hover over the column section where you want to add more columns.
- Click on the circles plus button inside the section.

- Search for the Columns block and click to add it.
This will add two more columns within one of the already existing columns section. Now you can see three columns.
In case you need to have four columns, repeat the process and create a nested column in the other column section.
So now you have gone through the steps on how to add columns and content into the columns. Now let’s take a glance at some of the important basics information on column blocks to remember.
Block Toolbar
Like every block has its own block-specific settings to manipulate the block layout, so does a column block. The column block offers standard block options such as alignment and width.
It is worth noting that the settings in the sidebar will change accordingly based on the block you embed inside column blocks. For example, if you added a paragraph when you click on the paragraph, the sidebar will display the options from the paragraph block settings.
Adjusting the column width
You can also adjust the width of the columns with the columns blocks. You can refer to the image below.
 When you add new columns, the additional settings will appear in the sidebar on the right. You can change the value of the column to make it bigger or smaller. Columns don’t need to have the same value.
So, we hope now you are ready to head-on with the column blocks.