
As of WordPress 5.0’s release on 6th December 2018, the Classic Content Editor was replaced with a brand-new block editor called Gutenberg. The “Gutenberg” is also known as the “WordPress Editor” or “Block Editor.”
The new block editor brings with it a completely different approach for content creation. You can create content using ‘blocks.’ In this post, you’re going to learn how to use those blocks and create gorgeous pages and blog posts.
Whether you’ve updated your site to WordPress 5.0 or not done it yet, you can follow on and learn the steps to use the new Gutenberg block editor to build content and layouts in your site.
Before we dive into the new Block editor, let us first compare and know the differences between Gutenberg Block Editor along with the Classic Editor.
Block editor VS Classic editor
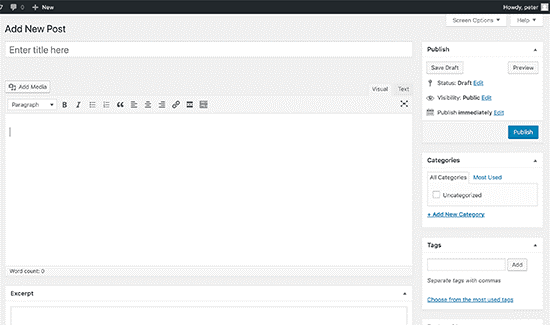
Here’s a view of the classic editor in WordPress
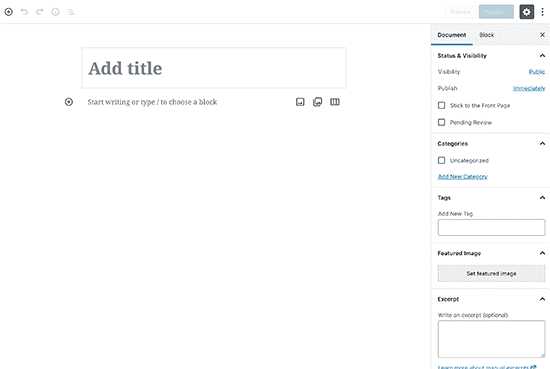
If you upgrade to WordPress 5.0, then this is what the new Gutenberg block editor looks like:
The Classic editor and Block editor are entirely different editors for creating content in WordPress.
The old Classic Editor was a basic text editor with formatting buttons very akin to the Microsoft Word.
The new editor uses an entirely different approach, called ‘Blocks’ (hence, the name Block Editor).
Each block is distinct for each content. So, it is easy to edit the content independent of the other blocks. You can add different blocks for content such as image, paragraph, galleries, videos, audio, lists, and many more.
The block editor has made things so easy! For example, to add a table in your content, you simply need to add a table block; select the specifications of columns and rows you need, and start adding content. Whereas in the Classic Editor such an option is missing. To add a table, you would need a suitable plugin that adds a table.
Creation of content is easy where you can drag and drop and move the block to the desired location. You can also save blocks as ‘Reusable Blocks’ that can be reused again.
So that was a brief intro, just to explain that the Gutenberg block editor is far easier than the Classic Editor.
An added advantage is that you can enhance the functionalities of the Gutenberg block editor by using external Gutenberg plugins. Many add on Gutenberg compatible plugins offer customizable blocks.
A quick tour of the block editor interface
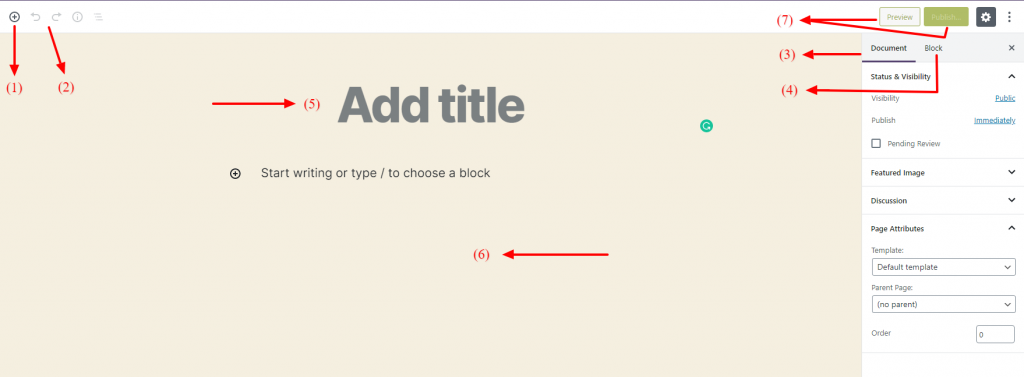
Before you start adding some blocks, let’s go over a quick run-down of the elements of the main block editor interface
Before you start adding the blocks, let’s go over a quick run-down of the elements of the main block editor interface.
(1) The button allows for adding new blocks.
(2) The symbols represent undo/redo buttons.
(3) The ‘Document’ button provides access to the settings of the document involving options like Categories & Tags, Featured Image etc.
(4) The ‘Block’ button provides access to settings specific to a block when you select an individual block.
(5) The ‘Title Bar’ lets you add the title of your content.
(6) Once you have added some blocks, you can add and edit the post’s content in this section.
(7) ‘Preview’ button lets you view a live preview of your post. As the names suggest, the ‘Publish’ and ‘Update’ buttons help to update or publish the posts respectively.
Let’s dig into the details!
Adding a new blog post or page
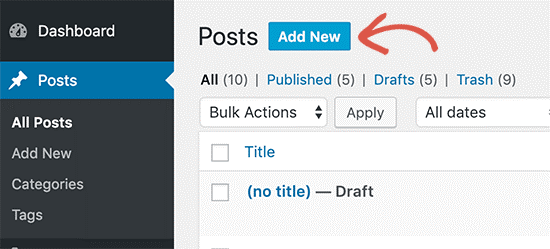
To start a new post, you can simply log in the Admin Dashboard. Just click on Posts » Add New menu from the WordPress admin.
If you are creating a page, then go to Pages » Add New menu. This will launch a new block editor.
You can also refer to the image given above.
Add a block in Gutenberg
By default, you can see the ‘Title’ block as the first block of every post or page. You can add the title here.
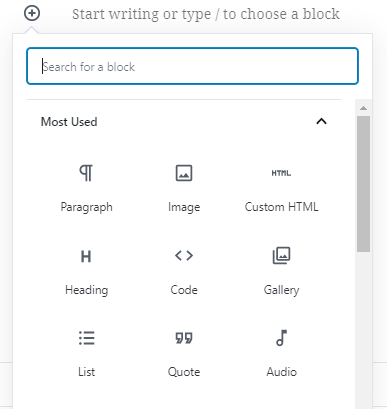
To add a new block, all you need to do is click the circled +Plus icon and select the type of content you want to add. You can add different type of blocks such as ‘Paragraph’ block or ‘Image’ block, as shown in the image given below. You can also select the ‘Common Blocks’ option the get the most commonly used blocks.
To add a Paragraph Block
By default, the next block after adding the title is a ‘Paragraph block.’ This allows users to start writing their text using the paragraph block.
However, if you want to add something distinct, then you can click on the button to add a new block, present on the top left corner of the editor, below an existing block, or at the left side of a block.
On clicking on the button, you can see the add block menu with a search bar on top and commonly used blocks below.
You can click on tabs to browse block categories or type in the keyword to quickly search for a block. You can select the block that you want to add.
To add an image block
To add an image anywhere in your blog post, all you need to do is hover over the spot where you want to insert your image.
When you do that, you will see the circled +Plus icon appear. Clicking on it will open the block list, which will help you choose the Image block.
When you do that, you’ll be able to upload a new image or select an image from your Media Library, just like you do with the current WordPress editor.
To add a media and text block
You can also add text beside an image, which was not possible to do with the Classic Editor. You simply need to click on the circled +Plus icon and click on the ‘Media and Text’ block icon.
To add a link to the text
To add a link to a text, you must simply click on the text and choose the ‘Insert link’ icon in the top of the block. Paste the URL link that you need to insert, in the destination URL box. It is always best to select the ‘Open in a New Tab’ and click on ‘Apply’ button.
Add a YouTube embed block
To embed a YouTube video, you must follow an almost identical process:
- Hover over where you want to embed your YouTube video.
- Click on the circled +Plus icon.
- Go to the Embeds tab.
- Choose YouTube.
Then, all you need to do is paste in the URL to the video, click ‘Embed,’ and you’ll see the embedded video right there in your post.
Settings in each Block
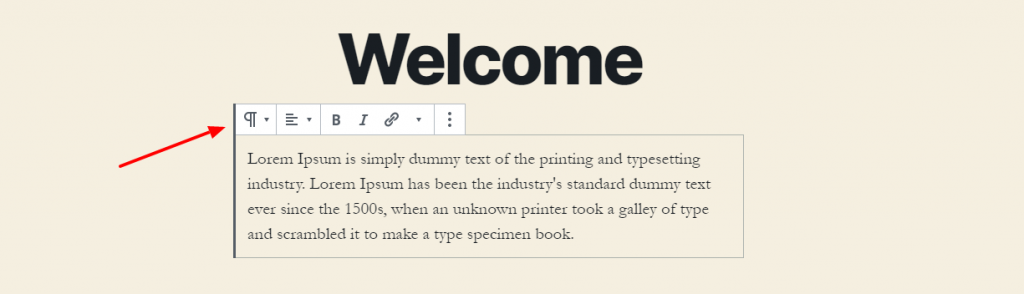
Each block comes with a toolbar, which you can see at the top of the block. The buttons in the toolbar would change depending on the block you are editing.
For example, in a ‘Paragraph’ block, you can see the formatting options like text alignment, bold, italic, and strikethrough buttons.
Apart from the toolbar, each block can also have its block settings which would appear at the right column of the edit screen.
If it is an ‘Image’ block you can see some specific settings. You can change the alignment as left, right or centre. You can also adjust the width. On clicking the three dots you can change the settings such as the duplicate the image.
Apart from the toolbar, there are settings which would appear in the right column of the edit screen. Here you can change the image dimensions such as height, width etc.
Moving a Block
The Gutenberg blocks are easy to arrange. You can easily move the blocks to the desired position by simple drag and drop or using the arrows. For the complete tutorial, you can refer to the article on ‘How to move a block.’
Saving and reusing Gutenberg blocks
Gutenberg blocks can also be saved and reused individually. This is quite a useful feature as it saves a lot of time, especially for bloggers who need to add specific content ‘snippets’ in their articles frequently.
To save a block for further use, you must click on the ‘menu’ button which is located at the right corner of each block’s toolbar. From the menu, select the ‘Add to reusable blocks’ option.
While saving, provide a name for the reusable block and then click on the ‘Save button.’
Your block will then be saved as a reusable block. You can find your block in the ‘Reusable’ tab. You can also find it by typing its name in the search bar.
WordPress database stores. All reusable blocks and you can manage them by clicking on the ‘manage all reusable blocks’ link where you can edit or delete any of the reusable blocks.
Publishing and post settings in Gutenberg
You can find the publish button on the top right side of your post.
Each WordPress post contains a lot of metadata. This includes information like publish date, categories and tags, featured images, and more. You can add all these details in the right column in the editor screen.
You can also save you post as a draft by clicking on the Save Draft Option.
The ‘Preview’ button helps you preview the post before publishing.
Plugin Options in Gutenberg
You can enhance the Gutenberg blogs by adding an external Gutenberg block Plugin. There are many Gutenberg Block plugins available in the market that can extend the functions of your Gutenberg blocks.
These plugins provide many blocks that are not available in the Gutenberg and help you to customize your website. It helps you build a perfect website or even create a landing page of your way according to your requirement. For example, Guteblock is a simple Gutenberg compatible plugin that helps you create an elegant website.
So, Gutenberg Block editor is cool and helps you create attractive content in a whole new easier and smarter way!