
At least once you might have been attracted to those clickable pop-up message displayed on your device. These are the push notifications!
The push notifications make it possible to get immense reach by engaging the users, even without using their contact details. One of the best ways to capture attention, the push notifications play a vital role to increase the conversion rate. The best part is that they are shown even when the user’s browser is not open.
Are you searching for ways to add push notification to your website?
Let’s check out how to add push notifications to your website!
Why Push notifications?
Push notifications enable to reach out to those users who are not on your website.
The surveys suggest that push notifications have twice as much click-rate than social media platforms and are more engaging than email marketing or SMS service. The push notifications effortlessly re-engage users without the need for their contact details.
Unlike emails, users are unlikely to unsubscribe the notifications from the site. The best part is that push notifications have no algorithm. So, they never fail to reach target the audience and are delivered instantly.
Sites such as Facebook, Pinterest, LinkedIn and many others using web push notifications.
How does it work?
The push notifications make use of two APIs. The first one is the Notification API that allows displaying notifications and the second one is the Push API. The Push API allows handling messages that are pushed to your client from your server via the push service used by your browser.
You will need the permission from the user to before you create push notification. Once the user gives permission, after that, the notifications get displayed. The users have full control over the display of notifications. They can snooze the notifications or even turn them off completely.
How to Set it up?
You can easily set up web push notifications using a plugin.
OneSignal is a free WordPress plugin that allows adding push notification to any WordPress website. Installing and activating the plugin is the first step. If you need assistance in the process, then you can check out our detailed step by step guide on how to install a WordPress plugin.
So, let us dig in deep and see how to add push notifications to a website using OneSignal.
Installing OneSignal
Here’s a brief idea to install the OneSignal plugin
- Visit the WordPress dashboard to add the plugin.
- Click on Plugins >> Add New and search for OneSignal plugin.
- Once you find the plugin, click on the ‘Install’ button.
- Once the plugin is installed next step is activating the plugin by simply clicking the ‘Activate’ button.
Once activated the plugin will add a new menu item marked as ‘OneSignal” to the WordPress admin bar.Click on the option and this will lead you to the take you to the plugin’s ‘Settings’ page.
You can see the page as shown below.
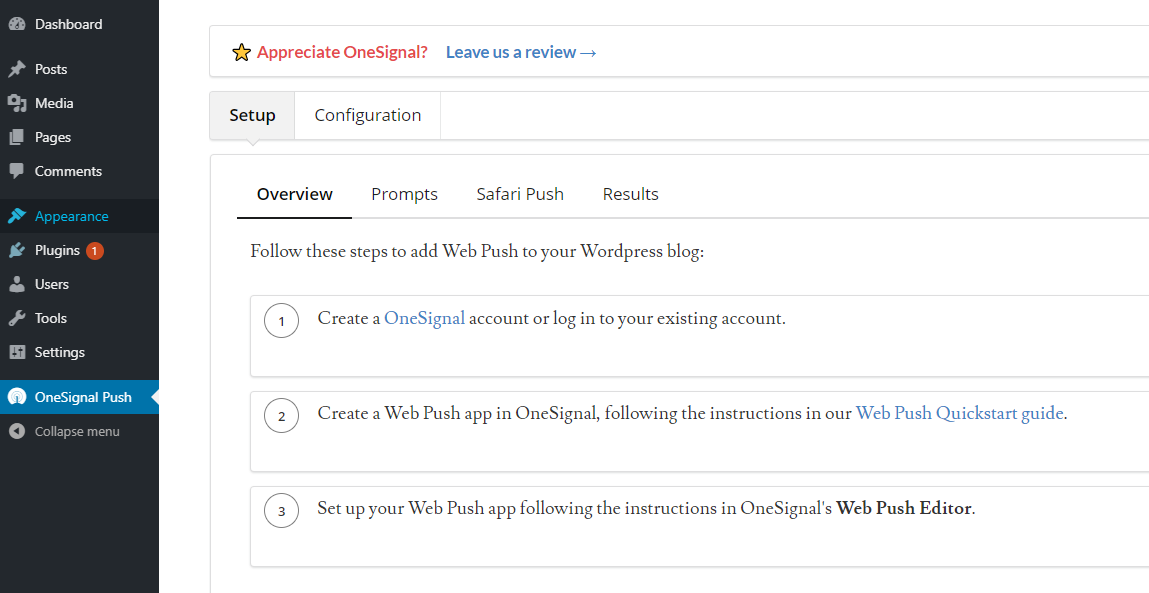
The settings page consists of “Setup” and “Configuration” tabs. Clicking on the set-up tab shows comprehensive documentation on the process of setting up OneSignal push notifications in WordPress. (In this guide, we have used the same process and have presented it in a simplified manner).
So, after installing OneSignal, further two important items are needed. These are the API Key and APP ID that must be entered in the plugin’s settings.
Let’s check out how to get the API Key and the APP ID.
Setting up OneSignal Push Notifications
First, you must create a OneSignal account. For that, you just simply visit the OneSignal website to get started. You must sign up first. Once you get a confirmation mail you can follow the link provided in the mail to continue. This will take you to a page as given below.

Enter the name of your website. After that click on ‘Web Push’ option and simply select ‘Configure Your platform’ button.
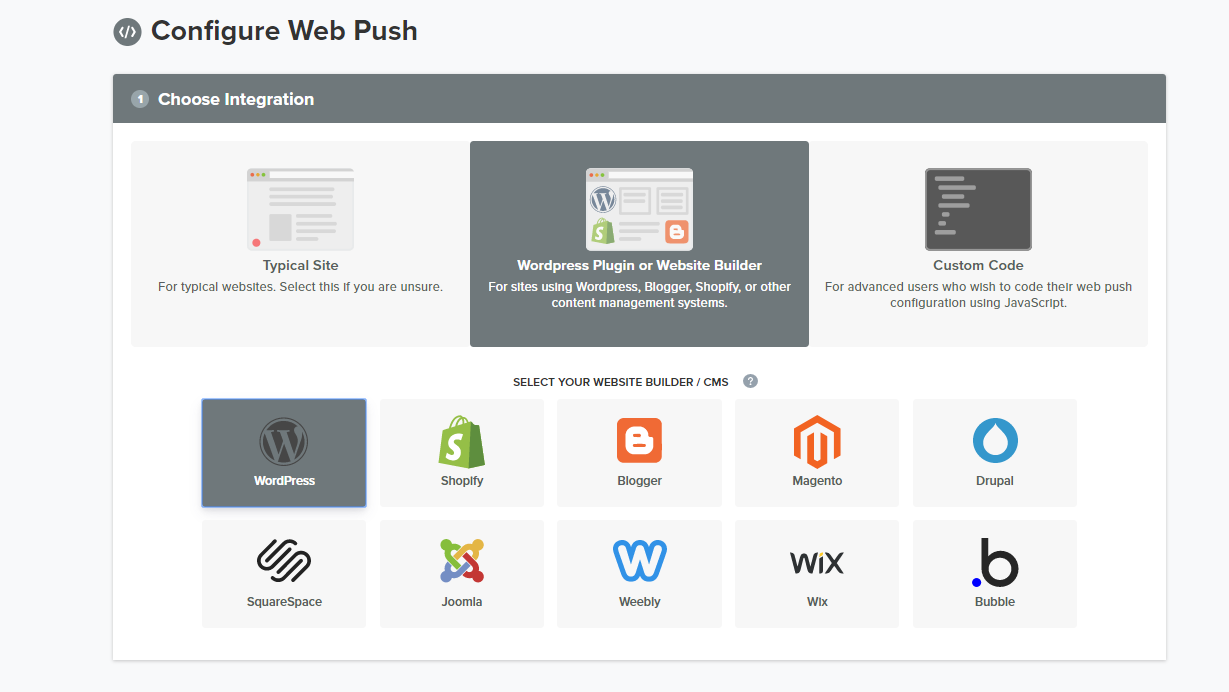
This will take you to a page where you must configure the web push. You must choose the platform where you need to integrate the Push notification. For that choose the ‘WordPress Plugin or Website builder option.’
On clicking, you will be asked to select the website builder/CMS from the options. Simply choose the WordPress option.
Then scroll down a bit and you will find the WordPress “Site Setup” option.
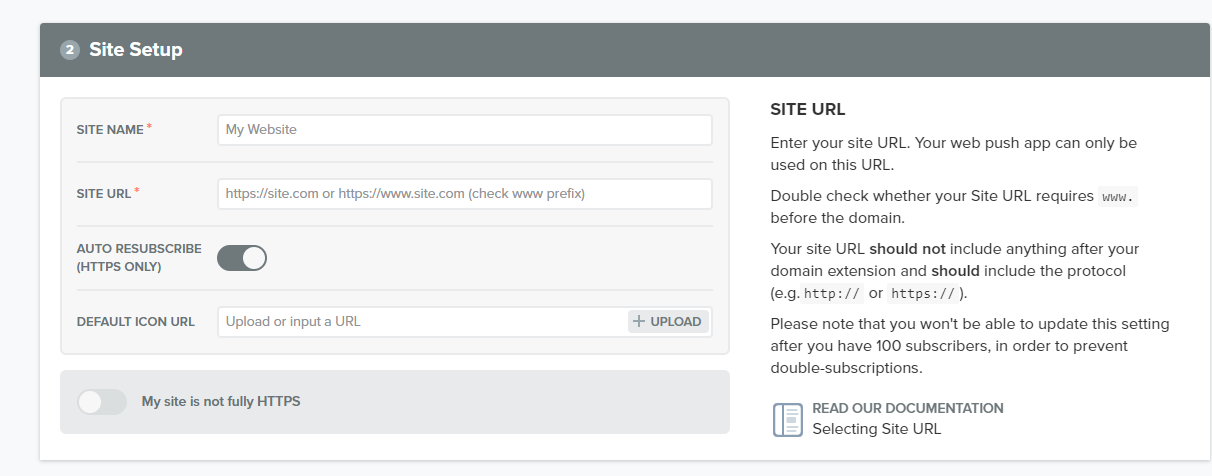
Here you must enter the site name, site URL, upload URL icon etc.
While uploading the URL icon, you must upload the website logo or Favicon. This logo would appear in the push notifications.
You can see a toggle which you can turn on in case your website is not using SSL/HTTPS. This step is important because normally you can send web push notifications only while using a secure HTTPS URL. If your WordPress site does not use HTTPS, then you need to turn this setting on and enter a label.
Once you are done, click on the Save button to store your OneSignal settings. After that, you can see the API keys that you need to copy.

So, you have earlier installed the OneSignal Plugin on your WordPress and now you have got the App ID and REST API Key for the further process.
Copy the App ID and REST API Key to the OneSignal WordPress plugin Configuration section.
Simply switch back to the OneSignal plugin settings on your WordPress site and click on the ‘Configuration’ tab. Here you must paste the APP and API keys you copied earlier.

Once this is finished you will be allowed to send push notifications via Chrome and Firefox web browsers.
Push Notifications via Safari Browser
If you need to send notification via Safari web browser then you must get the Safari API key and Safari Web ID.
To get the Safari API key and ID, you must go back to OneSignal website and go to the settings page for your app. Once there, you need to click on the edit icon next to Apple Safari.

Click on the edit symbol and you will be asked to enter your website title, URL, and optionally upload a site icon. Fill in the details as done in the previous process.

Once done you must next need to select the target SDK.

Choose WordPress and click next. Next, you will get the API key
Finally, you need to install the SDK. Here you will get you Rest API Key and Safari Web ID.

Click on the Save button to store your settings. After that, copy the Safari Web ID on the screen.
Once again, switch back to the plugin’s settings page on your WordPress site and paste the Safari Web ID under the configuration tab.
The push notification popup will also appear on mobile browsers.
Don’t forget to click on the Save button to store your plugin settings.
So now you are ready.
Try visiting your website in a new incognito browser tab. You can see a push notification appear on the top and a bell notification icon at the bottom right corner of the screen. You will also be able to see push notifications pop up on mobile browsers.
So now you are done! We hope this article helped you learn how to add web push notifications to your WordPress site.